CellML Model Repository tutorial
Section author: David Nickerson, Randall Britten, Dougal Cowan
About this tutorial
The CellML model repository is an instance of the Physiome Model Repository (PMR) customised for CellML models. PMR currently relies on the distributed version control system Mercurial (Hg), which allows the repository to maintain a complete history of all changes made to every file it contains. This tutorial demonstrates how to work with the repository using TortoiseHg, which provides a Windows explorer integrated system for working with Mercurial repositories.
Brief mention of the equivalent command line versions of the TortoiseHg
actions will also be mentioned, so that these ideas can also be used without
a graphical client, and on Linux and similar systems. These will be denoted
by boxes like this.
This tutorial requires you to have:
- A Mercurial client such as TortoiseHg or Mercurial installed
- The OpenCell CellML modelling environment
- A text editor such as Notepad++ or gedit
PMR concepts
PMR and the CellML model repository use a certain amount of jargon - some is specific to the repository software, and some is related to distributed version control systems (DVCSs). Below are basic explanations of some of these terms as they apply to the repository.
- Workspace
- A container (much like a folder or directory on your computer) to hold the files that make up a model, as well as any other files such as documentation or metadata, etc. In practical terms, each workspace is a Mercurial repository.
- Exposure
- An exposure is a publicly viewable presentation of a particular revision of a model. An exposure can present one or many files from your workspace, along with documentation and other information about your model.
The Mercurial DVCS has a range of terms that are useful to know, and definitions of these terms can be found in the Mercurial glossary: http://mercurial.selenic.com/wiki/Glossary.
Working with the repository web interface
This part of the tutorial will teach you how to find models in the Physiome Model Repository (http://models.physiomeproject.org), how to view a range of information about those models, and how to download models. The first page in the repository consists of basic navigation, a link to the main model listing, a search box at the top right, and a list of model category links as shown below.
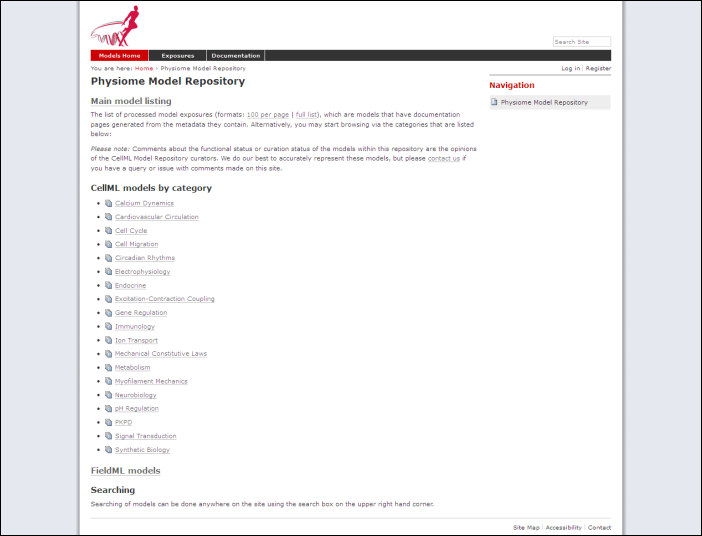
The front page of the Physiome Model Repository.
Model listings
Clicking on the main model listing or any of the category listings will take you to a page displaying a list of exposed models in that category. Click on electrophysiology for example, and a list of over 100 exposed models in that category will be displayed, as shown here.
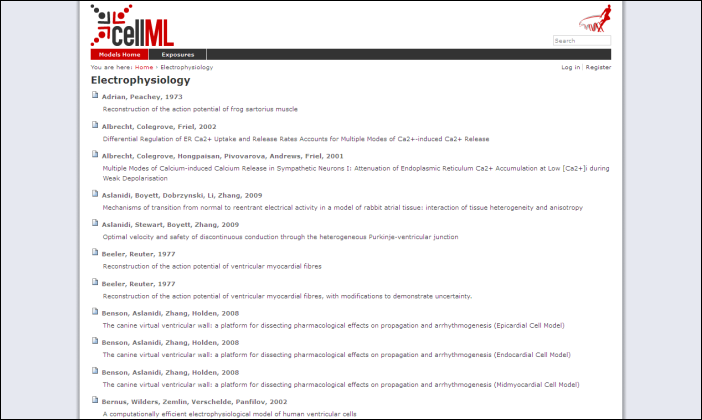
A list of models in the electrophysiology category.
Clicking on an item in the list will take you to the exposure page for that model.
Searching the repository
You can search for the model that you wish to work on by entering a search term in the box at the top right of the page. Many of the models in the repository are named by the first author and publication date of the paper, so a good search query might be something like goldbeter 1991. A list of the results of your search will probably contain both workspaces and exposures - you will need to click on the workspace of the model you wish to work on. Workspaces can be identified because their links are pale blue and have no details line following the clickable link. In the following screenshot, the first two results are workspaces, and the remainder are exposures.
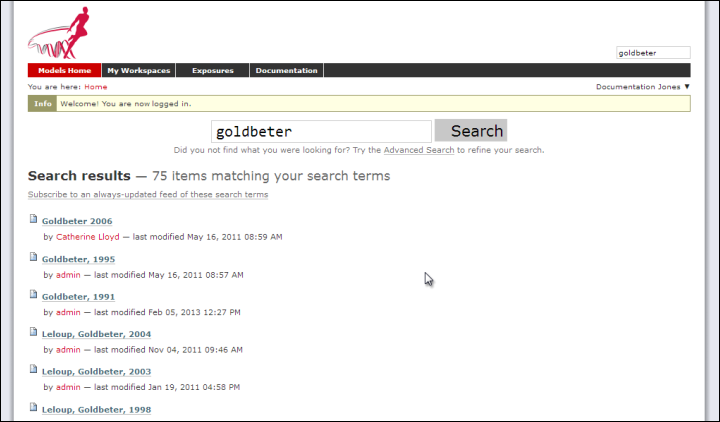
A search results listing on the Physiome Model Repository site.
Click on an exposure result to view information about the model and to get links for downloading or simulating the model. Click on workspaces to see the contents of the model workspace and the revision history of the model.
Working with the repository using Mercurial
This part of the tutorial will teach you how to clone a workspace from the model repository using a Mercurial client, create your own workspace, and then push the cloned workspace into your new workspace in the repository. We will be using a fork of an existing workspace, which provides you with a personal copy of a workspace that you can edit and push changes to.
Registering an account and logging in
First, navigate to the teaching instance of the Physiome Model Repository at http://teaching.physiomeproject.org/.
Note
The teaching instance of the repository is a mirror of the main repository site found at http://models.physiomeproject.org/, running the latest development version of the PMR Software.
Any changes you make to the contents of the teaching instance are not permanent, and will be overwritten with the contents of the main repository whenever the teaching instance is upgraded to a new PMR Software release. For this reason, you can feel free to experiment and make mistakes when pushing to the teaching instance. Please subscribe to the cellml-discussion mailing list to receive notifications of when the teaching instance will be refreshed.
See the section Migrating content to the main repository for instructions on how to migrate any content from the teaching instance to the main (permanent) Physiome Model Repository.
In order to make changes to models in the CellML repository, you must first register for an account. The Log in and Register links can be found near the top right corner of the page. Your account will have the appropriate access privileges so that you can push any changes you have made to a model back into the repository.
Click on the Register link near the top right, and fill in the registration form. Enter your username and desired password. After completing the email validation step, you can now log in to the repository.
Note
This username and password are also the credentials you use to interact with the repository via Mercurial.
Once logged in to the repository, you will notice that there is a new link in the navigation bar, My Workspaces. This is where all the workspaces you create later on will be listed. The Log in and Register links are also replaced by your username and a Log out link.
Mercurial username configuration
Important
Username setup for Mercurial
Since you are about to make changes, your name needs to be recorded as part of the workspace revision history. When commit your changes using Mercurial, it is initially "offline" and independent of the central PMR instance. This means that you have to set-up your username for the Mercurial client software, even though you have registered a username on the PMR site.
You only need to do this once.
Steps for TortoiseHg:
- Right click on any file or folder in Windows Explorer, and select TortoiseHg ‣ Global Settings.
- Select Commit and then enter your name followed by your e-mail address in "angle brackets" (i.e. less-than "<" and greater-than ">"). Actually, you can enter anything you want here, but this is the accepted best practice. Note that this information becomes visible publicly if the PMR instance that you push you changes to is public.
Steps for command line:
- Edit the config text file:
- For per repository settings, the file in the repository: <repo>\.hg\hgrc
- System-wide settings for Linux: %USERPROFILE%\.hgrc
- System-wide settings for Windows: %USERPROFILE%\mercurial.ini
Add the following entry:
[ui]
username = Firstname Lastname <firstname.lastname@example.net>
Forking an existing workspace
Important
It is essential to use a Mercurial client to obtain models from the repository for editing. The Mercurial client is not only able to keep track of all the changes you make (allowing you to back-track if you make any errors), but using a Mercurial client is the only way to add any changes you have made back into the repository.
For this tutorial we will fork an existing workspace. This creates new workspace owned by you, containing a copy of all the files in the workspace you forked including their complete history. This is equivalent to cloning the workspace, creating a new workspace for yourself, and then pushing the contents of the cloned workspace into your new workspace.
Forking a workspace can be done using the Physiome Model Repository web interface. The first step is to find the workspace you wish to fork. We will use the Beeler, Reuter 1977 workspace which can be found at: http://teaching.physiomeproject.org/workspace/beeler_reuter_1977.
Now click on the fork option in the toolbar, as shown below.
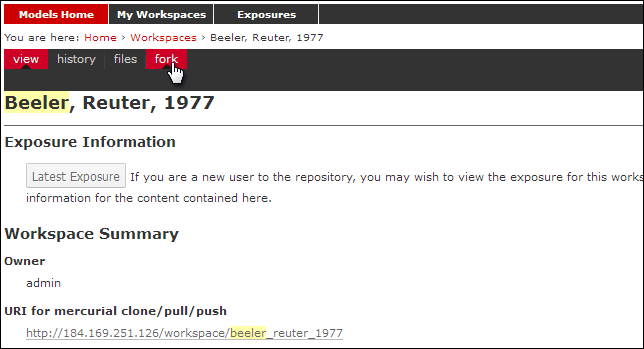
You will be asked to confirm the fork action by clicking the Fork button. You will then be shown the page for your forked workspace.
Cloning your forked workspace
In order to make changes to your workspace, you have to clone it to your own computer. In order to do this, copy the URI for mercurial clone/pull/push as shown below:
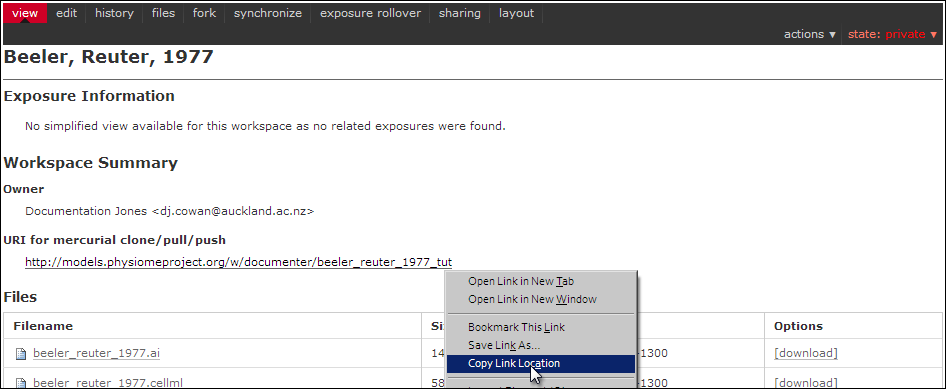
Copying the URI for cloning your workspace.
In Windows explorer, find the folder where you want to create the clone of the workspace. Then right click to bring up the context menu, and select TortoiseHG ‣ Clone as shown below:
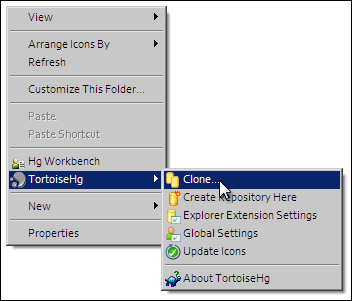
Paste the copied URL into the Source: area and then click the Clone button. This will create a folder called beeler_reuter_1977_tut that contains all the files and history of your forked workspace. The folder will be created inside the folder in which you instigated the clone command.
Command line equivalent
hg clone [URI]
You will need to enter your username and password to clone the workspace, as the fork will be set to private when it is created.
The repository will be cloned within the current directory of your command line window.
Making changes to workspace contents
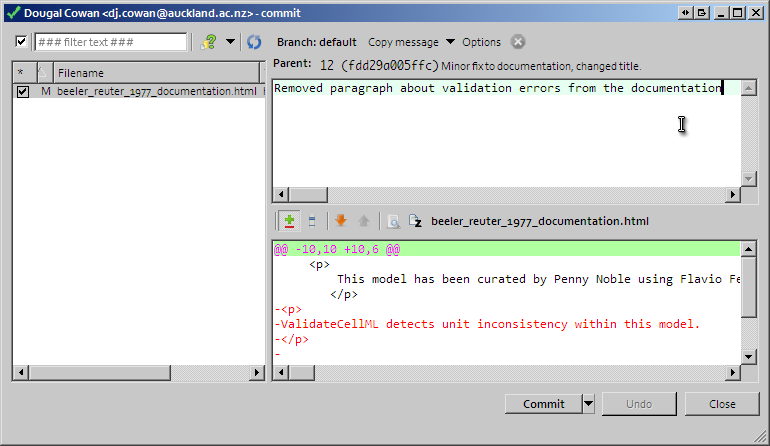
Your cloned workspace is now ready for you to edit the model file and make a commit each time you want to save the changes you have made. As an example, open the model file in your text editor and remove the paragraph which describes validation errors from the documentation section, as shown below:

Save the file. If you are using TortoiseHg, you will notice that the icon overlay has changed to a red exclamation mark. This indicates that the file now has uncommitted changes.
Committing changes
If you are using TortoiseHg, bring up the shell menu for the altered file and select TortoiseHg ‣ Hg Commit. A window will appear showing details of the changes you are about to commit, and prompting for a commit message. Every time you commit changes, you should enter a useful commit message with information about what changes have been made. In this instance, something like "Removed the paragraph about validation errors from the documentation" is appropriate.
Click on the Commit button at the far left of the toolbar. The icon overlay for the file will now change to a green tick, indicating that changes to the file have been committed.
Command line equivalent
hg commit -m "Removed the paragraph about validation errors from the documentation"
Pushing changes to the repository
Your cloned workspace on your local machine now has a small history of changes which you wish to push into the repository.
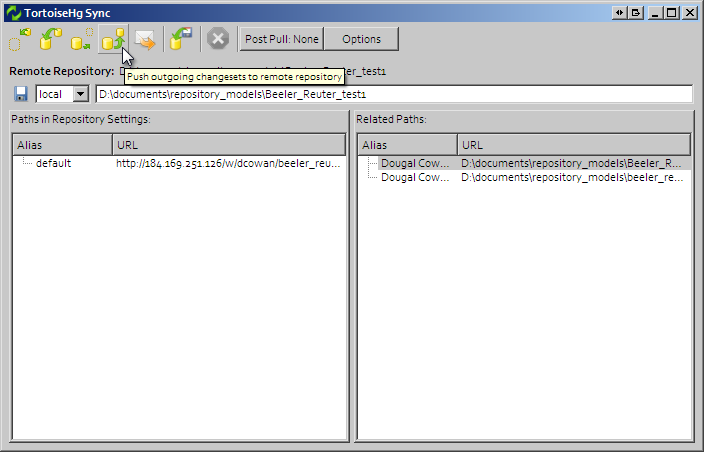
Right click on your workspace folder in Windows explorer, and select TortoiseHg ‣ Hg Synchronize from the shell menu. This will bring up a window from which you can manage changes to the workspace in the repository. Click on the Push button in the toolbar, and enter your username and password when prompted.
Command line equivalent
hg push
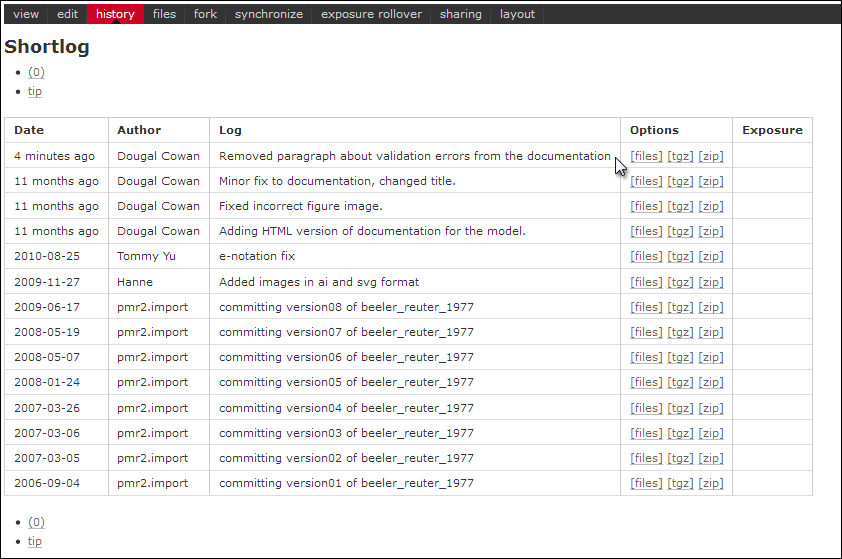
Now navigate to your workspace and click on the history toolbar button. This will show entries under the Most recent changes, complete with the commit messages you entered for each commit, as shown below:
Create an exposure
As explained earlier, an exposure aims to bring a particular revision to the attention of users who are browsing and searching the repository.
There are two ways of making an exposure - creating a new exposure from scratch, or "Rolling over" an exposure. Rolling over is used when a workspace already has an existing exposure, and the updates to the workspace have not fundamentally changed the structure of the workspace. This means that all the information used in making the previous exposure is still valid for making a new exposure of a more recent revision of the workspace. Strictly speaking, an exposure can be rolled over to an older revision as well, but this is not the usual usage.
As you are working in a forked repository, you will need to create a new exposure from scratch. To learn how to create exposures, please refer to Creating CellML exposures.
Migrating content to the main repository
As noted above, the teaching instance used in this tutorial is not suitable for permanent storage of your work. One of the advantages of using a distributed version control system to manage PMR workspaces is that it is straightforward to move the entire workspace, including the full history and provenance record, from one location to another. Recent releases of PMR Software have also provided the feature to export exposures so that they can then be imported into another PMR Software instance.
If you would like to move your work from the teaching instance of the model repository into a new workspace on the main repository (or from any PMR Software instance to another one), you should follow these steps:
- Ensure that you have pushed all your commits to the source instance;
- Create the new workspace in the destination repository;
- Navigate to the workspace created and choose the synchronize action from the workspace toolbar, as shown below.
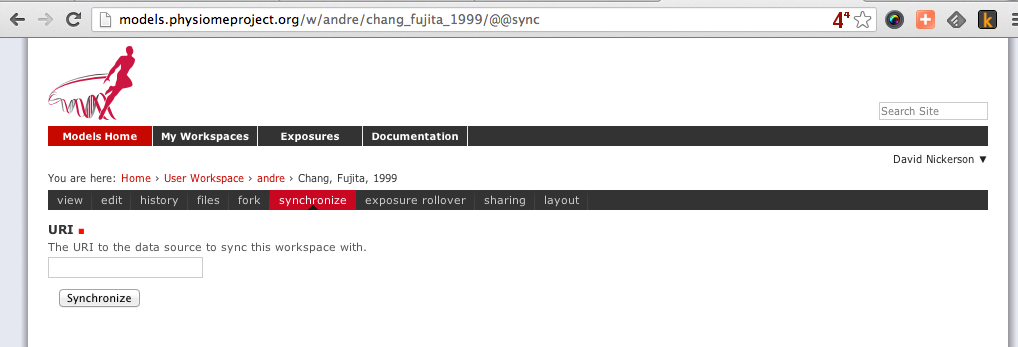
- Fill in the URI of your workspace on the source instance (e.g., http://models.physiomeproject.org/w/andre/cortassa-ECME-2006)
- Click the Synchronize button.
In a similar manner, you are able to copy exposures you might have made on the teaching instance over to the main repository, or from the main to the teaching instance if you want to test things out. Follow these steps to migrate an exposure from one repository to another.
- Navigate to the exposure you would like to migrate in the source repository.
- Choose the wizard item from the toolbar as shown below.
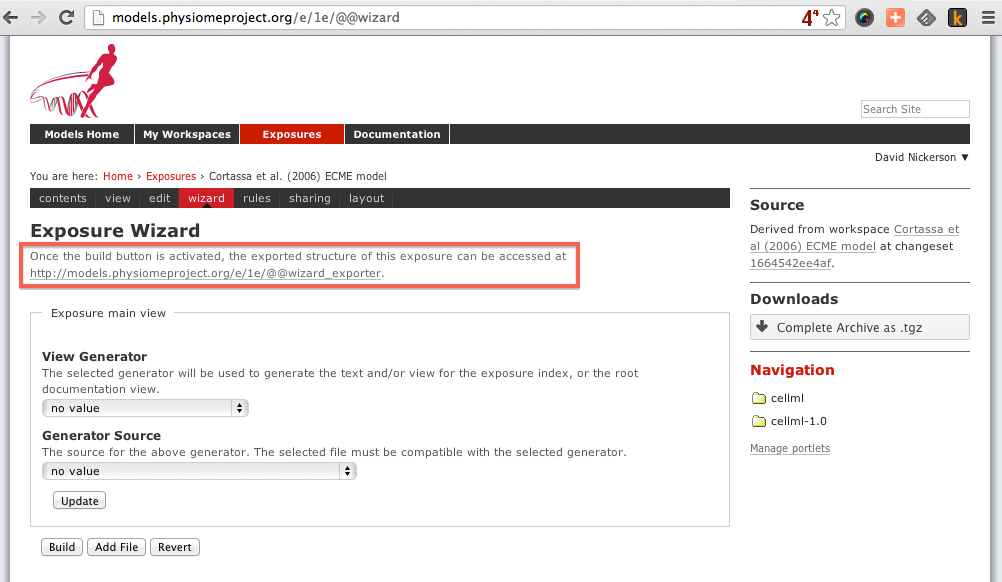
- In the destination repository, navigate to the desired revision of the (published) workspace and choose the Create exposure action as described in the directions for creating an exposure from scratch
- Rather than building a new exposure, choose the Exposure Import via URI tab in the exposure creation wizard, as shown below.
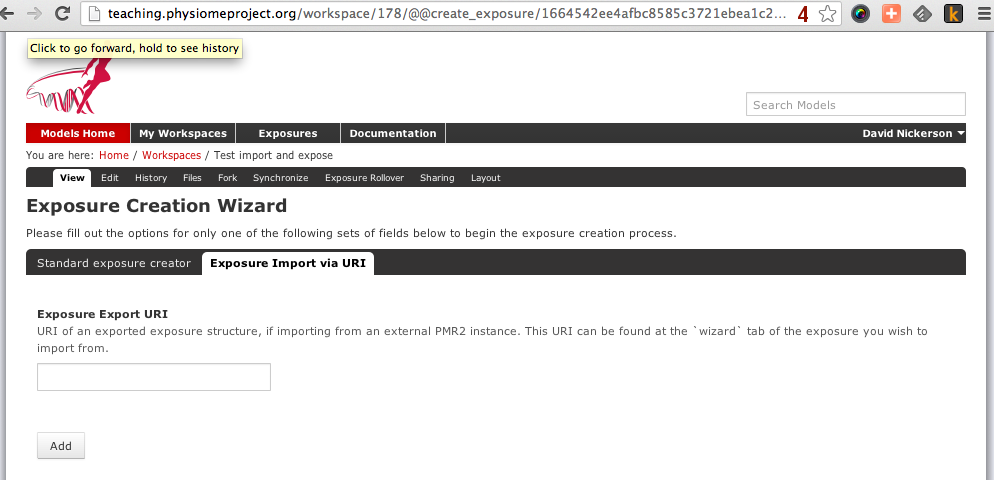
- Copy and paste the URI from the source exposure wizard, highlighted above, into the Exposure Export URI field in the exposure creation wizard shown above.
- Click the Add button. This will take you back to the standard exposure build page, but now with all the fields pre-populated from the source exposure.
- Navigate to the bottom of the page and click the Build button to actually build the exposure pages. You are free to reconfigure the exposure if desired, some help is available for this if needed.